There have been a couple of articles recently on handmade floats by professional traditional float makers but did you know that it is fairly easy to make your own? You can find all the materials on eBay very easily such as the balsa wood dowels on eBay here –> http://ebay.to/2tIxoQ1
This article has been written in the hope that it will encourage a few more people to look at the way in which they fish and that it will open up their view on the world of angling.
Today’s society has become an “instant” world where you can walk in to a shop and within a couple of hours have everything you need to become an overnight angler, to many this is a satisfying and rewarding way to fish and there is nothing wrong with that but have you ever imagined the feeling of watching a float you have made sail away under the water and indicate you have a fish?
It is these sorts of feelings and knowledge that I feel are being lost to our sport, so I thought I would write a step by step guide showing you how easily and cheaply you can make your own float.
 The first thing you will need to do is to get your raw materials for making floats, now there are lots of materials you can make floats from such as reed stems, bird feathers, porcupine quills, twigs and even a plain old straw but for this guide I am going to use balsa.
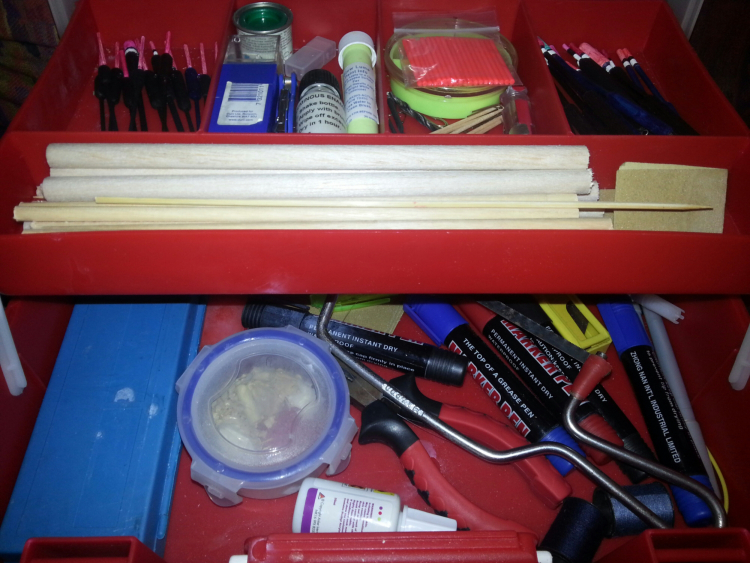
Okay so what are you going to need?
Here is the list you will need in order to follow this guide and make your own floats;
 Balsa Wood diameter of your choice
Black Permenant Marker Pen
Red Permenant Marker Pen
A Tub of Corrective Fluid
A Sheet of Fine Sand Paper
A Sharp Craft Knife
Super Glue
A Modelling Paint Brush Small
A Size 8 Swivel
A Baiting Drill or Small Drill Bit
Waterproof Clear Varnish
Pair of Pliers
Junior Hacksaw
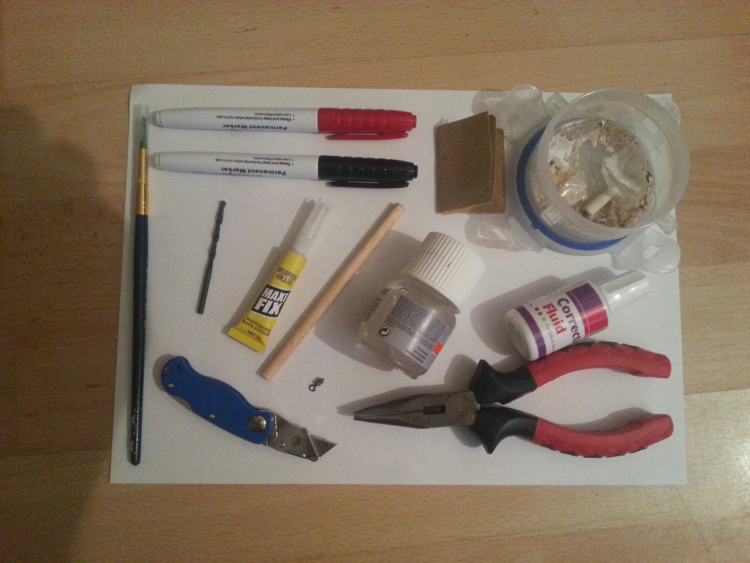
So you have all of your materials, the next thing to do is to cut a piece of Balsa between 4-5 inches long.
 Very carefully at one end drill a small hole in the middle about 2-3cm deep.
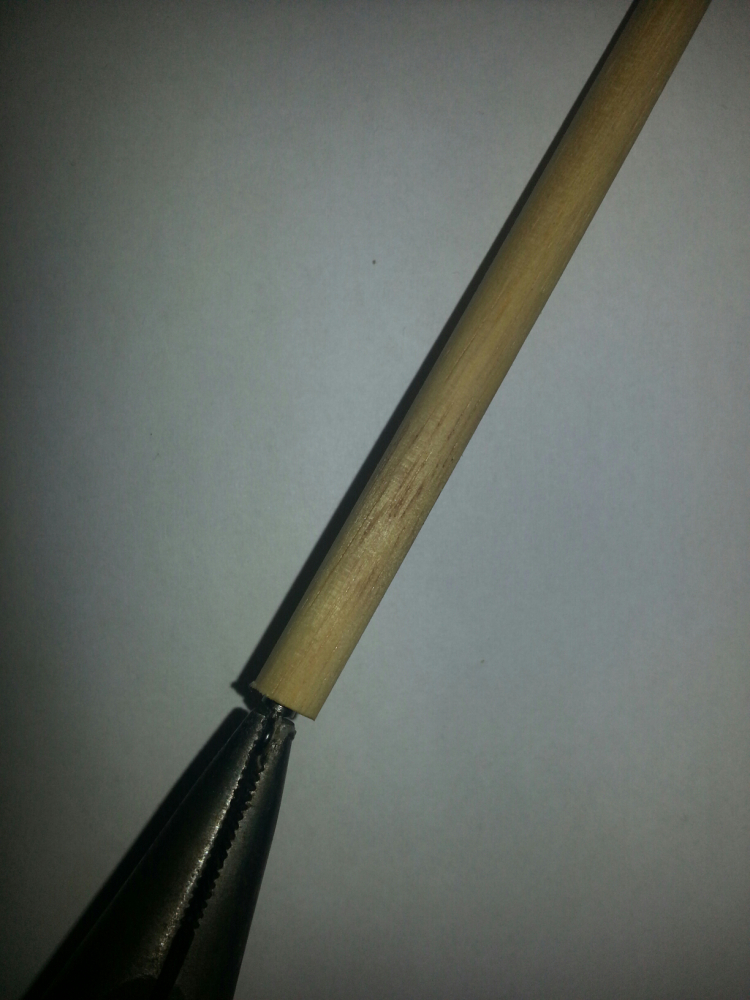 Next you need to cut the loop off one end of a swivel using the pliers. Hold the remaining loop of the swivel in the teeth of the pliers and gently force the barrel of the swivel into the hole in the balsa, don’t worry that the hole is smaller it will expand as you push the swivel in.
 Once all of the barrel has been pushed into the balsa, gently pull it back out and squeeze a couple of drops of super glue into the hole then reinsert the barrel. Set this aside and allow to partly dry for about an hour.
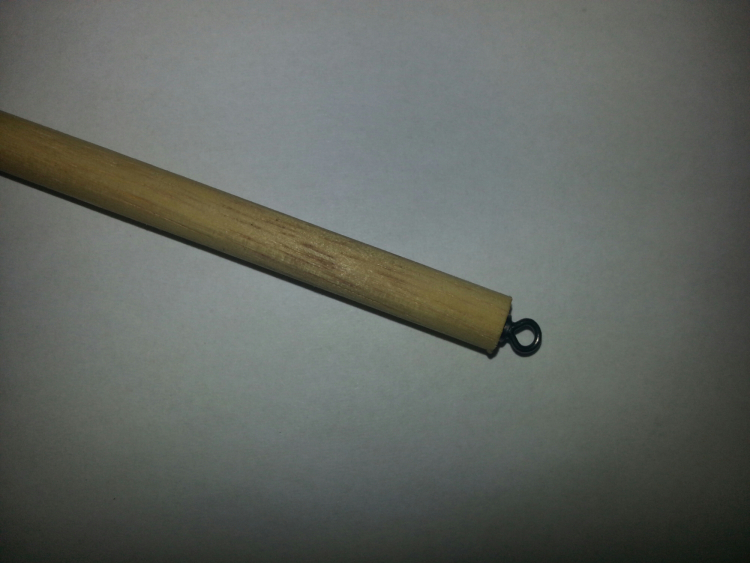
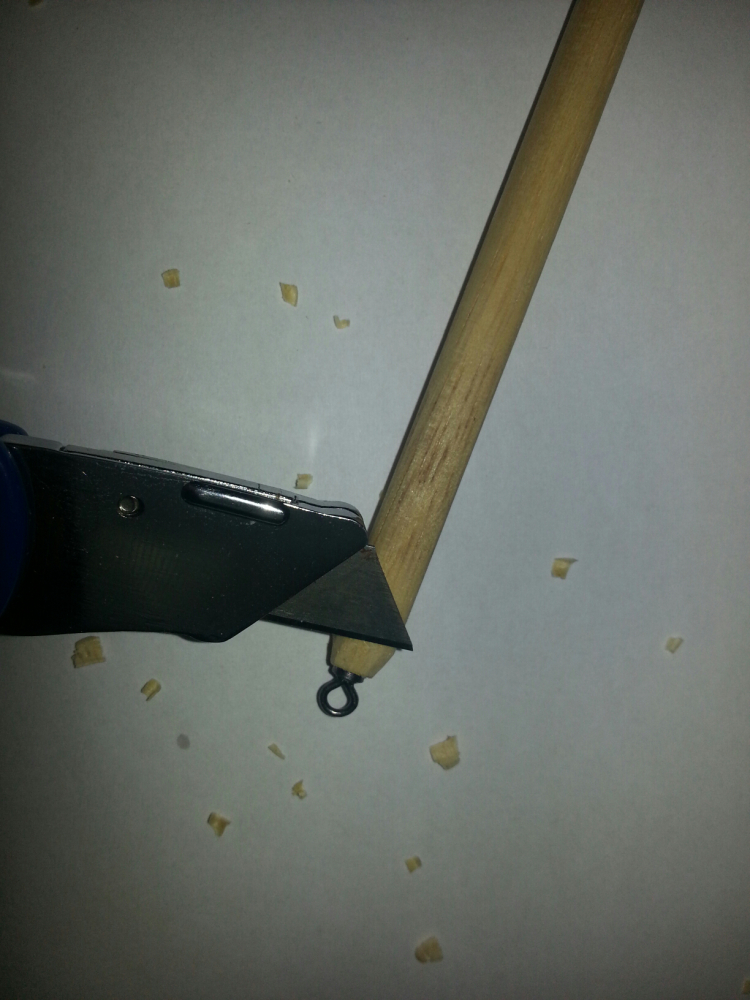 Next you need to very carefully take small shavings off the piece of balsa at the end with the swivel in until the balsa is roughly blended in to the end of the swivel barrel.
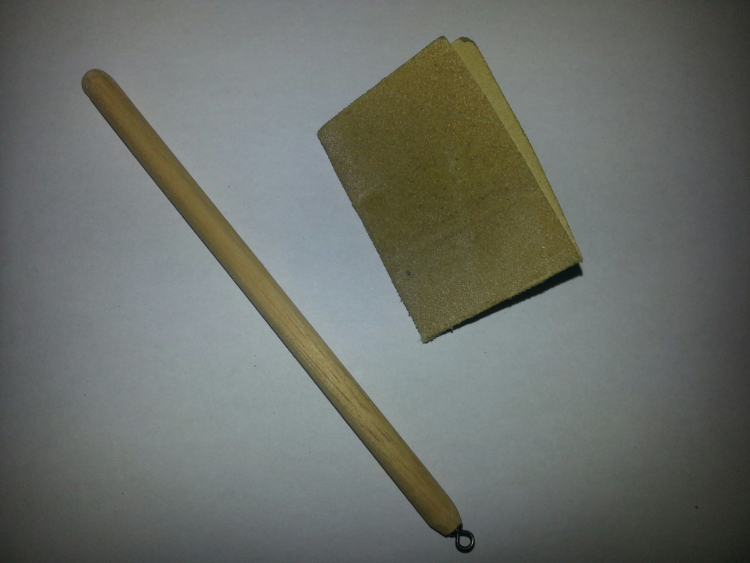 Now take your sandpaper and gently sand both ends into a nice smooth finish, carefully blowing any balsa dust away.
The next stage is the fun one, you get to colour in your float I will show you how I colour mine but you can be creative with your designs and colours.
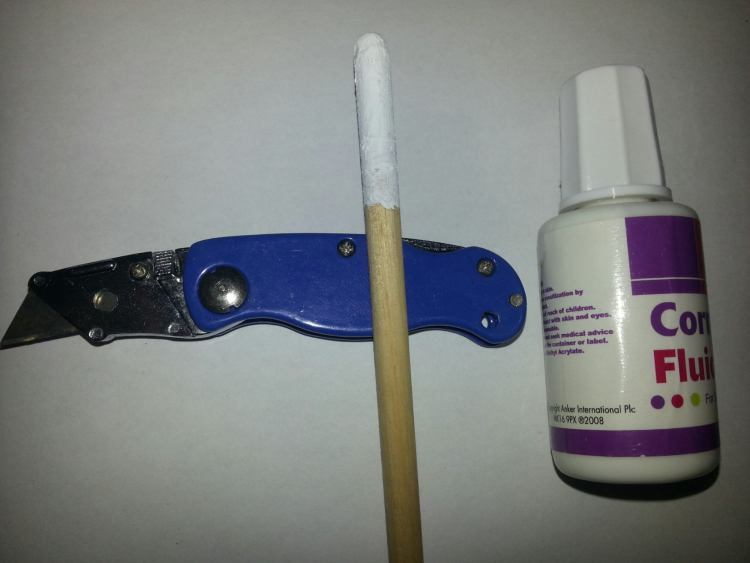 Firstly, take the correction fluid and apply it to the end of your float without the swivel covering about 4-5cm of the balsa. Allow this to dry for a couple of minutes.
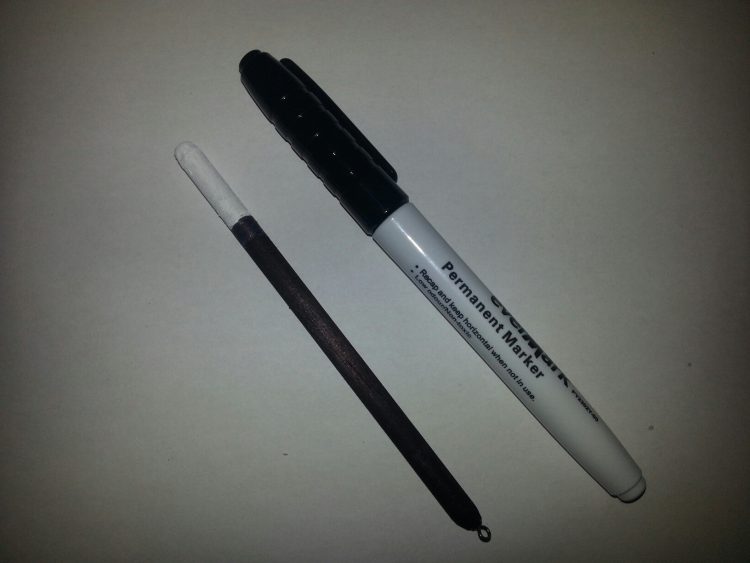 Take your black marker pen and draw a circle around the balsa where the correction fluid meets the balsa. The easiest way to create this circle is to hold the pen still and rotate the float, once you have this circle carefully colour in all of your float below the circle right down to the swivel making sure it is all black with now gaps anywhere.
 Repeat the circle process with your red marker leaving a small ring of correction fluid between the black and your red circle, colour in the float from your red circle to the top of the float.
Leave everything to dry for 5 minutes then clamp the swivel loop between the pliers teeth again and carefully paint a layer of varnish on to your float. I have completed my floats like this before but to make it completely waterproof allow the varnish to dry for 24 hours then paint another layer of varnish on just to completely seal it, again allowing it to dry for 24 hours.
You now have a completed float ready to use, test it in your sink by using a length of line and adding BB shots until it sits how you want it to, remember the amount of weight required or you will be constantly fiddling about on the bank getting it right.
This type of float is perfect for all types of float fishing on commercial lakes and if you need to create a distance float simply cut yourself a longer piece of Balsa at the beginning meaning that you will need more weights to set the float correctly which means you will get more distance on the cast. I have been using these for years and find that I can even get positive indications from 1oz Gudgeon. There are unlimited types of float you can make so get creative, you can even make your own bite indicators!! (To get the dark wood effect on balsa simply paint a couple of layers of cold black tea onto the balsa and allow it to dry before varnishing it)
 These are never going to be the amazing work of people such as Paul Duffield, Mark Greenhalgh, Ian Lewis or Greg Kaminski but they are easy to make and work really well.
I Hope you enjoyed reading and have a go yourself.
Ant


![FLADEN Fishing - 25 Piece Assorted LAKE and RIVER Coarse Fishing Floats Collection in a Float Tube - Come with handy fishing guide [21-01]](https://m.media-amazon.com/images/I/41Kg9k3ALpL._SS520_.jpg)