It never fails to amaze me how, as specimen anglers, we can spend hundreds of pounds – often thousands – buying the finest tackle available in pursuit of our quarry, before spending just as many hours trying to bank that fish of a lifetime, yet when we do eventually get a result we often fail to get a photograph that does the fish, or the effort required to bank it, any justice at all.
I remember well when I got the images back of my first UK twenty pounders; I’d waited so long to catch them before typically bagging two in one session, but when I saw my mate’s handy work with the camera the shots were terrible – I was gutted! Eventually, I managed to get a local image house to work their magic, but by following a few basic principles they could have been right first time. So in this piece, I’ll give you a few tips to take a great shot – even better, make sure your angling companions read this article to ensure they get a great image of your fish on the bank!
We’ve all seen it – the headless angler – fish and body intact but head removed, or worse still, the entire angler but only half a fish! In truth there’s no excuse for it nowadays, as all cameras have decent viewfinders, digital cameras in particular, but like getting most things right in angling, getting that perfect image takes a little planning and forethought.
Think Ahead
The first tip is to think ahead – make sure you’ve packed the camera! It sounds daft, I’m sure you’ll agree, but if I had a pound for every time I’ve heard somebody say that they forgot to pack their camera when I enquire about images of their big catch…. To me, a camera is an integral part of my fishing equipment and I never leave home without it. It’s always left in my tackle bag, so it can’t be left behind. If your camera is a communal one, get another! They really don’t cost the earth with decent digitals available for as little as £30.00 and 35mm even cheaper.
Also important is to ensure it will work when needed. If it’s film, make sure you have a spare film, if digital make sure the memory card is in it, and if it requires batteries make sure they have some juice. As an angling writer, I use my camera on a daily basis and have found rechargeables are the best way forward. I have several sets and it’s become a simple routine to swap them over when ever I leave for a session.
Assuming you have made it to the bank with your camera, the next job is to ensure anybody who might be using it is familiar with how it works, so that when there is a fish on the bank and time is of the essence, they are not struggling just to find the ‘on’ switch! My digital camera is quite straight forward to use, but all of my angling companions have been shown how to use it, so that now it’s second nature to all of them when there is a fish on the bank that needs photographing. This allows me to concentrate on holding the fish and them to concentrate on getting the perfect shot.
Another important aspect is being ready at any time. Just like preparing your mat, scales, and sling in advance, it can pay to have your camera equipment ready and easily accessible so that you are not wasting valuable time rooting around in bags for spare batteries or memory cards when there is a fish on the bank. I always have mine ready so that whoever is taking the shot can be ready in a mater of seconds.
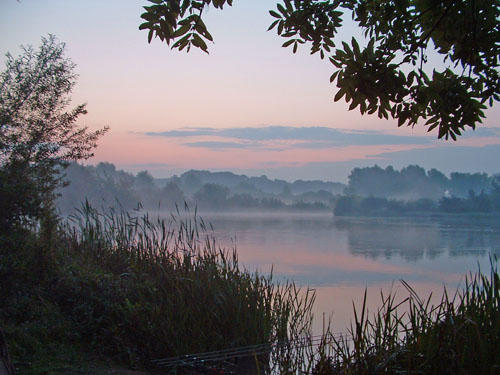
Finally, you need to think about location. Look at any great shot and you will see that the background can be just as important as the fish itself, a cluttered or busy background will detract from the subject matter so I always have a quick look around the swim as I’m setting up just to assess where the best spot would be for a photo should the situation arise. I’m not suggesting you go traipsing around the lake looking for the best spot, but within each swim you should be able to find a good, uncluttered and clean background.
Try to avoid having tackle, bivvies, other anglers or anything else that would take your eye away from the fish. Ideally you are looking for shrubs, bushes, walls, fences, landscapes – just so long as it’s pleasing on the eye. Also, if night fishing, think ahead to the hours of darkness – if using flash it helps if the flash has something to bounce off, which in turn will improve the overall composition of the image. We’ve all seen the shot of an angler with complete darkness all around them – not the most atmospheric of images, but if you were to take the image with a bush, fence or wall right behind the angler, there would be subject matter to fill the whole of the frame. Just a minute’s thought in advance can make all the difference between a photo that gets shoved in the draw and one that gets hung on the wall!
‘Say Cheese…’
Now comes the fun bit, actually taking the shots. The golden rule here is filling the frame. Too close and the headless angler will be making another appearance, but too far away and you’ll look like you are holding a tiddler. A good rule of thumb is to try and fill three quarters of the subject matter centrally within the frame. Digitals are great as you can simply up the image quality and come further back, allowing you to zoom in and crop the image afterwards, but if using film it helps to get it right first time.
Next is to think about the shot itself, in the heat of the moment it’s all to easy to forget the basics and just fire a few off, but reign yourself in a touch and look at the viewfinder properly and see what else is filling the frame around angler and the fish. Also of major importance is the angle at which you take the shot. All too often the photographer is standing up whilst the subject is kneeling down – rarely does this make for a good photo – always try to ensure you are kneeling down or at the same level as the subject. Better still, get even lower. When I’m taking images of friends with fish, I’ll often lie flat out so that the shot comes from underneath, which can really give impact to the size of the fish, and rather than taking from directly in line, try taking shots angled from the side, either tail or head end – a little bit of thought when framing the shot can bring about some fantastic results.
 Practice makes perfect
Another good tip I learnt from a professional photographer I used to know was to ‘take plenty’. If you take one shot, what are the chances of it being perfect? I’ll tell you – pretty slim! The more you take the better the chances of getting the perfect shot – as I say, try a few angles, fill the frame and keep snapping. With digital it costs nothing and even on film I would encourage the photographer to fill their boots, for the sake of a couple of quid to get the film processed I would be happy for them to fill it. But don’t go overboard, as time is of the essence and you don’t want to be keeping the fish out of water any longer then is absolutely necessary.
From the captor’s point of view, you need to keep the fish steady and low to the mat, primarily for the safety of the fish, but this will also help the photographer frame the shot easily, and before you lift make sure you’ve poured a little water over the fish to ensure it’s clean and ready to have its photo taken!
On Your Own
What happens if you are on your own when you catch a big one? There are a few schools of thought here. First is to ask another angler to take a shot for you, but I have to say I’m not a big fan of this method, usually because you end up with ‘butter fingers Billy,’ who not only fails to get you or the fish in the shot at all, but also manages to break the camera in the process!
Personally I prefer to Self-Take. I like to get the fish back in the water as quickly as possible and I don’t like the idea of walking around a lake trying to find somebody to help – much quicker, and with practice, far easier, to take it yourself using self timer.
There are various ways to take a shot on timer. Most cameras have a countdown facility whereby you depress the shutter button and then have a set amount of time to get ready, or you can buy a remote shutter button which you press when you are ready, or an air release adaptor which is basically a thin wire tube with a bulb on the end which you attach to your camera at one end and then press the bulb at the other when you are ready to take. All of these methods are very effective but I much prefer using the cameras own self-timer device, for me it’s just much quicker.
Taking a good shot of yourself can take a little practice, so do just that, set out your mat in the garden and take a few shots – work out how far you need to be away from the camera and at what angle you need it to be in order to get you and a fish in shot. You’ll soon get the hang of it and be taking some great shots, just remember to follow the same basic principles about framing and backgrounds.
Most of my images are on self-take now as I’m usually the only one around, so it’s a great skill to learn as you become totally self sufficient – always put the safety of the fish first though and never leave them uncovered or unprotected on a mat.
Equipment
Just like fishing tackle, you can spend as little or as much as you like on camera gear, but if you shop around you can get some fantastic deals. As a writer I’m using a camera on a daily basis in order to take images to go with my work, so a digital camera suits my needs perfectly as it removes the print costs. If you own or have access to a PC it makes sense to go digital as you can edit and store as many images as you like, and online printers like Photobox can professionally print from your digital images for pence if you get a few done at a time.
Many seasoned photographers will say that film is still the better option and if you can afford the print costs then fine, but digitals are getting better and cheaper all the time. It’s a very rare occasion that I wish I still had my SLR in favour of my current digital set-up. I currently use a Fujifilm S304, with 6x Optical Zoom and 3.2 mega pixels. The main reason I purchased it was for its great zoom capability, and when I purchased it many years ago it was around £300.00. A lot of money to some I know, but as I say, it’s also a work tool. However, the current equivalent camera would now cost you less than £100.00, as I say; they are getting better and cheaper all the time!
Not everything has to cost a fortune though, my mini tripod which I find essential for self-take photography cost me 99p off eBay – and it came all the way from Hong Kong! Likewise the 55mm Polarised filter I bought which set me back no more than a tenner. The above set up has allowed me to get some fantastic shots of fish, both on the bank and in their habitat, but you could get a complete outfit to do the job for well under £50.00.
If I could offer one piece of advice to end with, it would be to practice. Whenever you are out on the bank, take a few shots; the lake, wildlife, landscapes, set-up – whatever! The more you practice the better you become and in time you’ll be framing fish photos all over the house – that’s assuming the other half will let you!
Julian Grattidge
November 2010