When it comes to lure fishing the Americans have some pretty simple yet highly effective rigs that they use for their bass fishing. A few of these rigs have been showing up on the UK scene over the last few years, a lot of them however are still not being used.
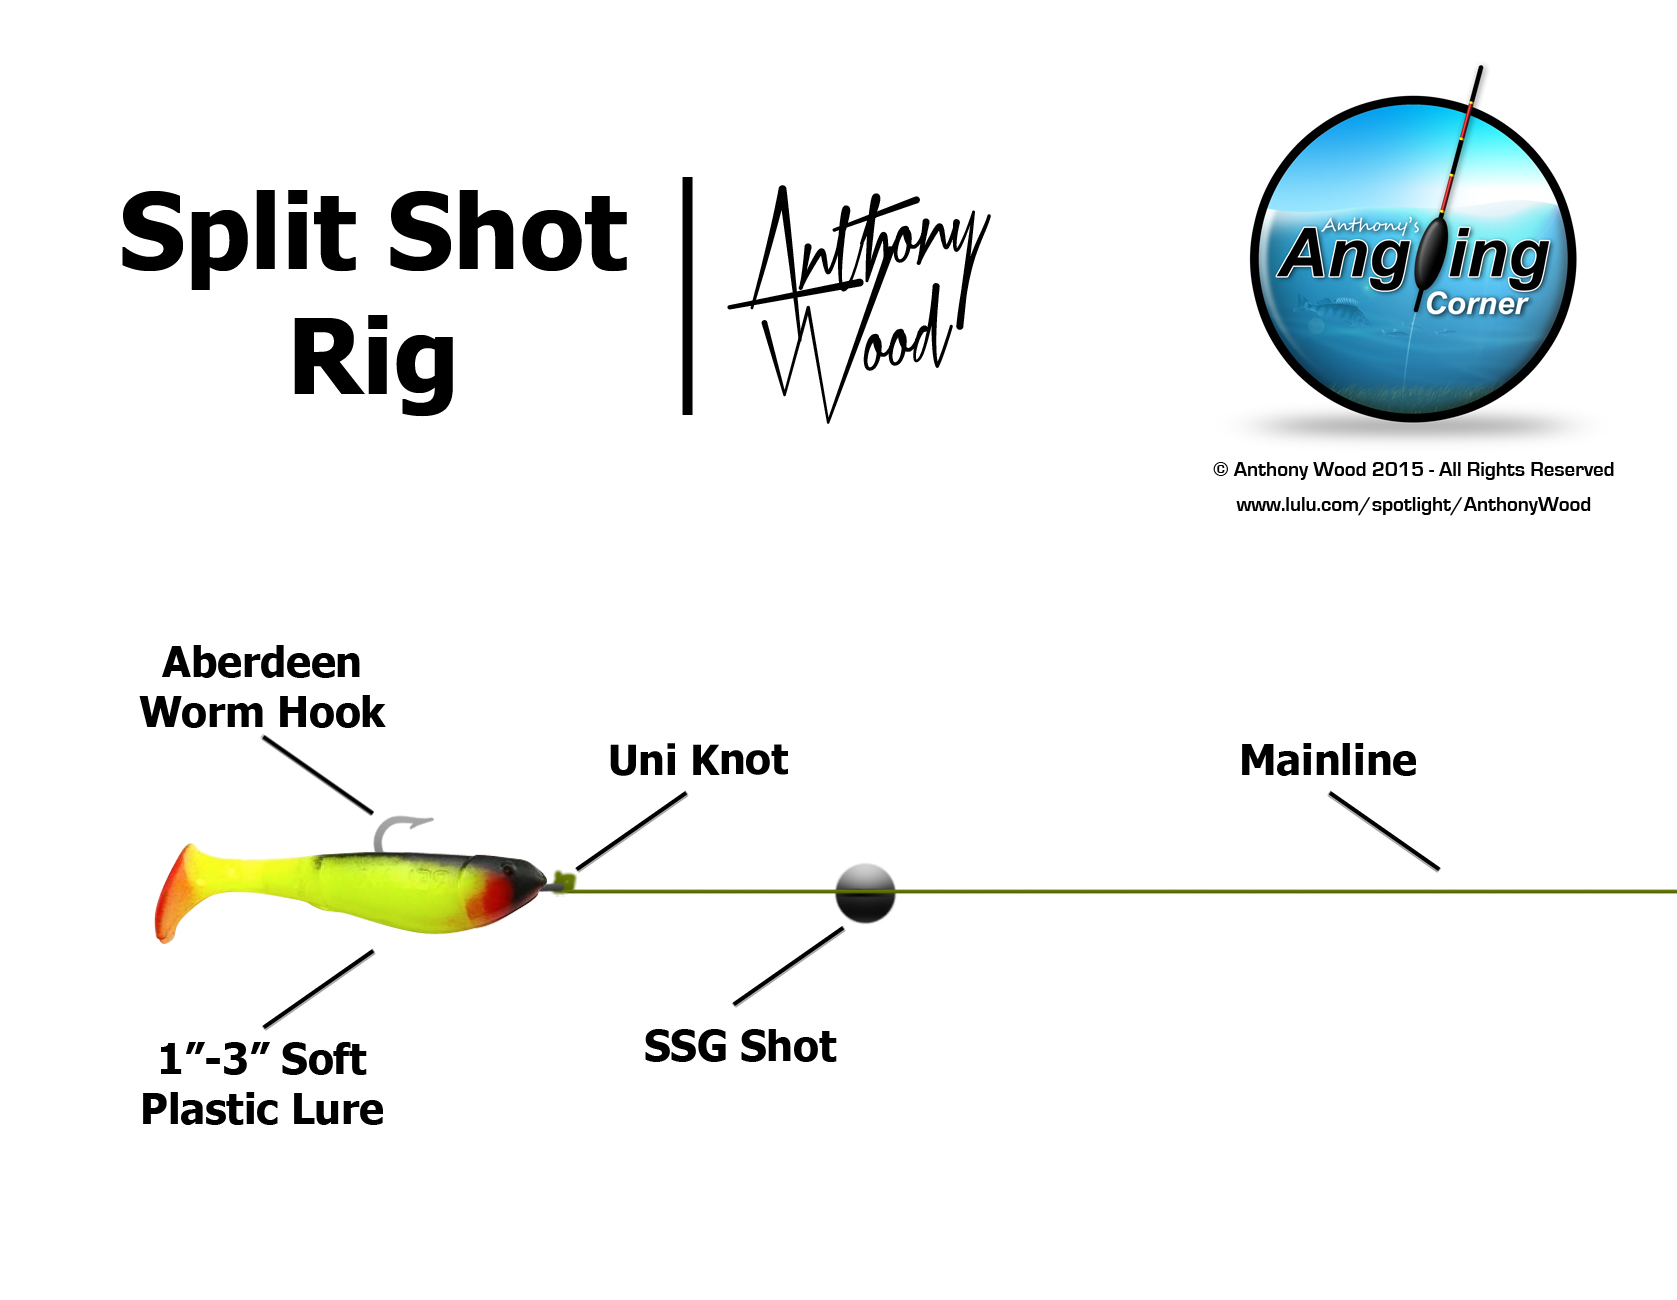 The first of these rigs is the “Split Shot Rig” now this rig is designed to work in shallower water up to 10ft. It will work in deeper water but you will start to lose the bite sensitivity.
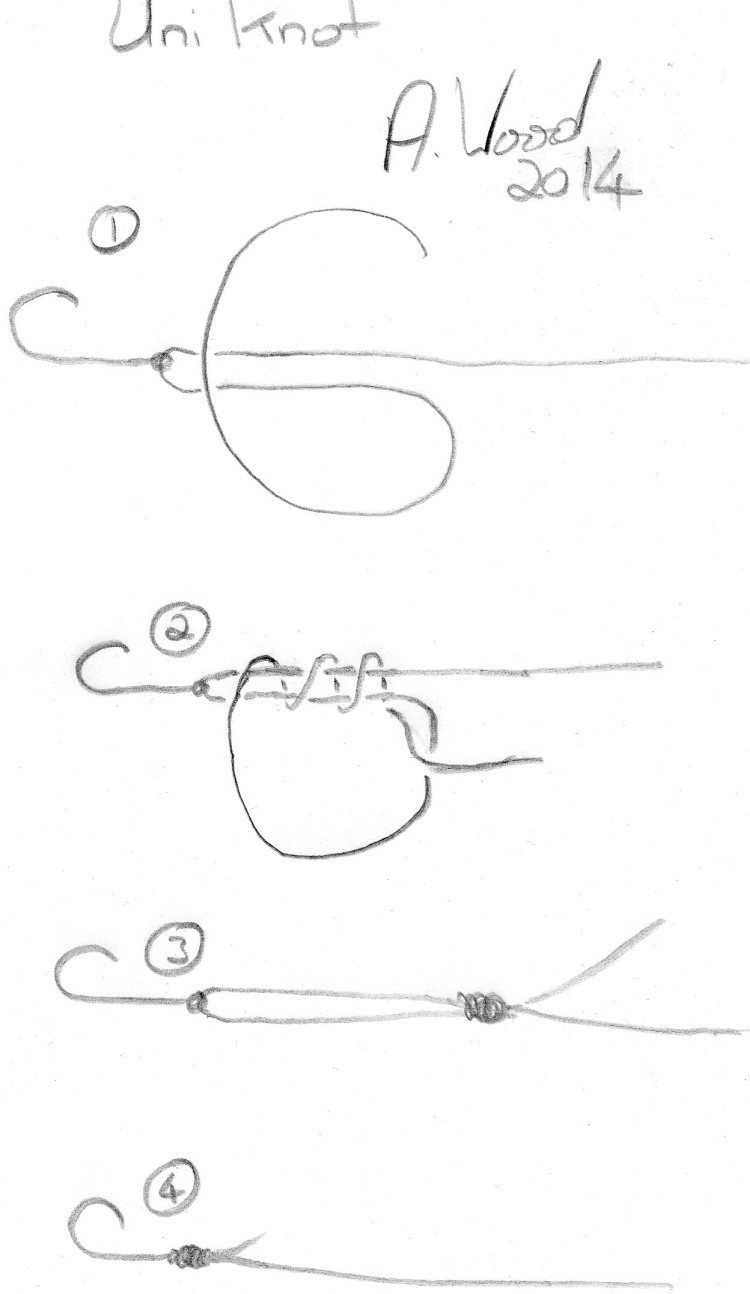
So how do you set up the rig? Well it couldn’t really be any simpler, use 100m of fluorocarbon on your reel and then simply tie a hook of your choice on to the end of your line using a uni knot (also known as a griner knot).
Depending on how much movement you want you then attach a single SSG shot to your main line any where from 1″ to 24″ above the hook, make sure to use a round shot as it helps to eliminate snagging.
 With this style of fishing you want to use a soft plastic lure of between 3-5″ to match the hook. Okay so you now have your rig set up and we will now explain as best as w can how to use the method.
The method of the split shot rig is basically to cast out your rig and then slowly retrieve it keeping the split shot in contact with the bottom of the canal, lake or other body of water that you are fishing as much as possible.
Recognising bites on this method can be a little tricky as they can sometimes just feel like extra resistance on the line which you are going to feel anyway as you encounter snags along the bottom of where your fishing. The only advice we can give is if you feel resistance no matter how little give it a short swift flick with the rod to set the hook if it is a fish.
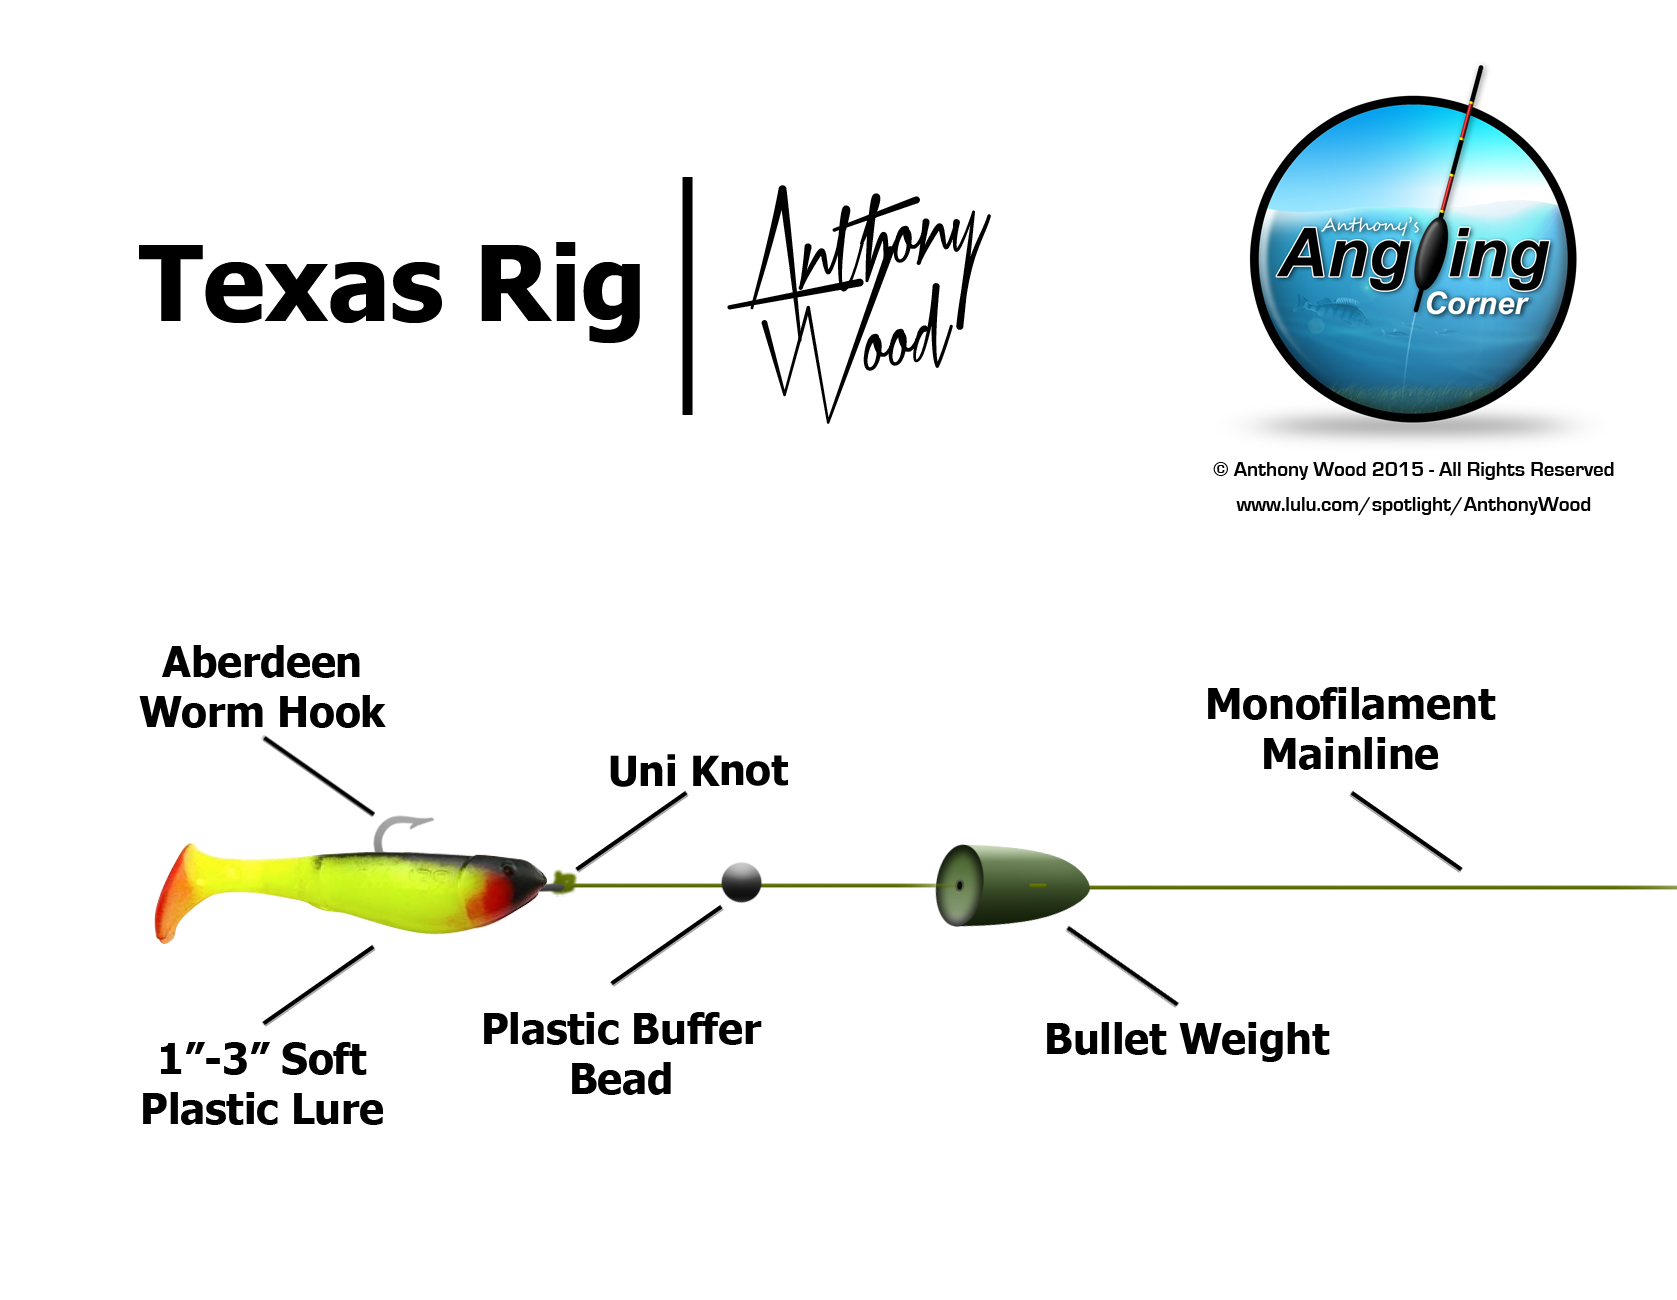 The second rig we want to show you is the “Texas Rig”, this rig is similar to the “split Shot Rig” however it does not have a fixed shot. Firstly slide a bullet weight/lead on to your main line, the weight of this will depend on whether you are fishing a canal, lake or river as if you are fishing a heavy current you will obviously need a heavier weight.
Next slide on a buffer bead making sure that the diameter of the middle hole is smaller than the eye of the hook you will be attaching, finally attach the hook again use the hook of your choice tied on with a uni knot.
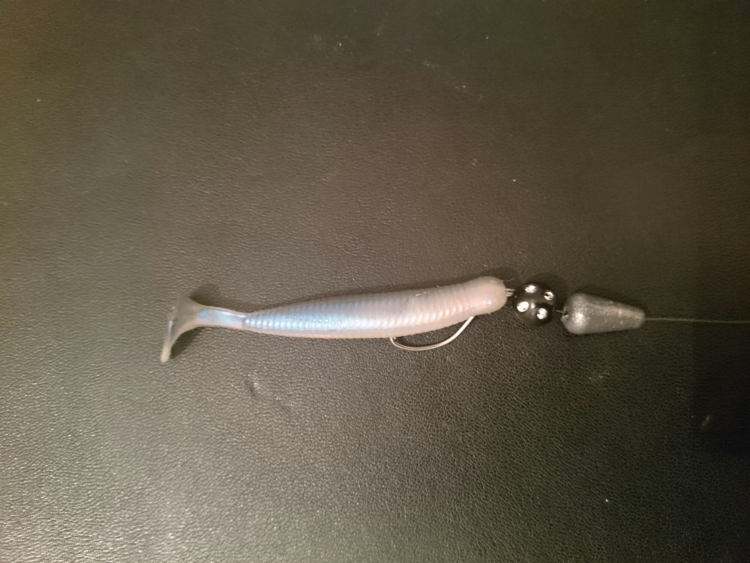 The Texas Rig is used to fish soft plastic baits in a wounded fish style of cast and retrieve. Basically you cast out your bait and then leave it to settle on the bottom for 10-15 seconds. After the pause give the lure a slight twitch, tighten the line up and leave for 10 seconds before repeating the process until the lure is back and you need to cast it again.
There are lots of ways to hook the soft plastic lure and a lot of them depend on your personal preference although fishing weedless is a good one for fishing close to structures. Again the takes can be a bit hard to detect and basically it is just experience and practice that will help you.
 The next rig is the one you have probably heard of and that is the “dropshot rig”. This is probably the most popular and most advertised of the rigs currently on the scene in the UK.
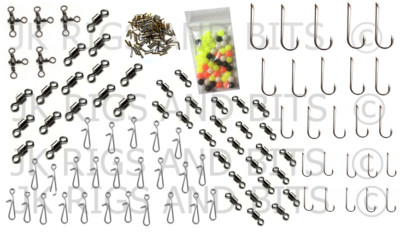
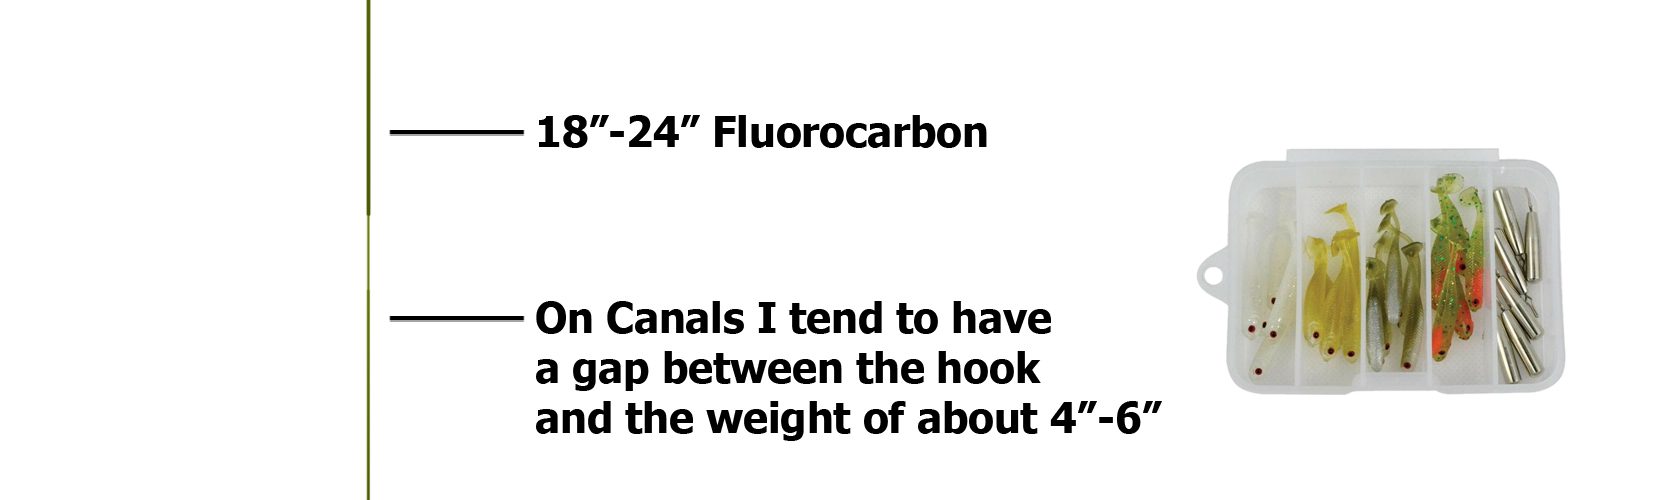
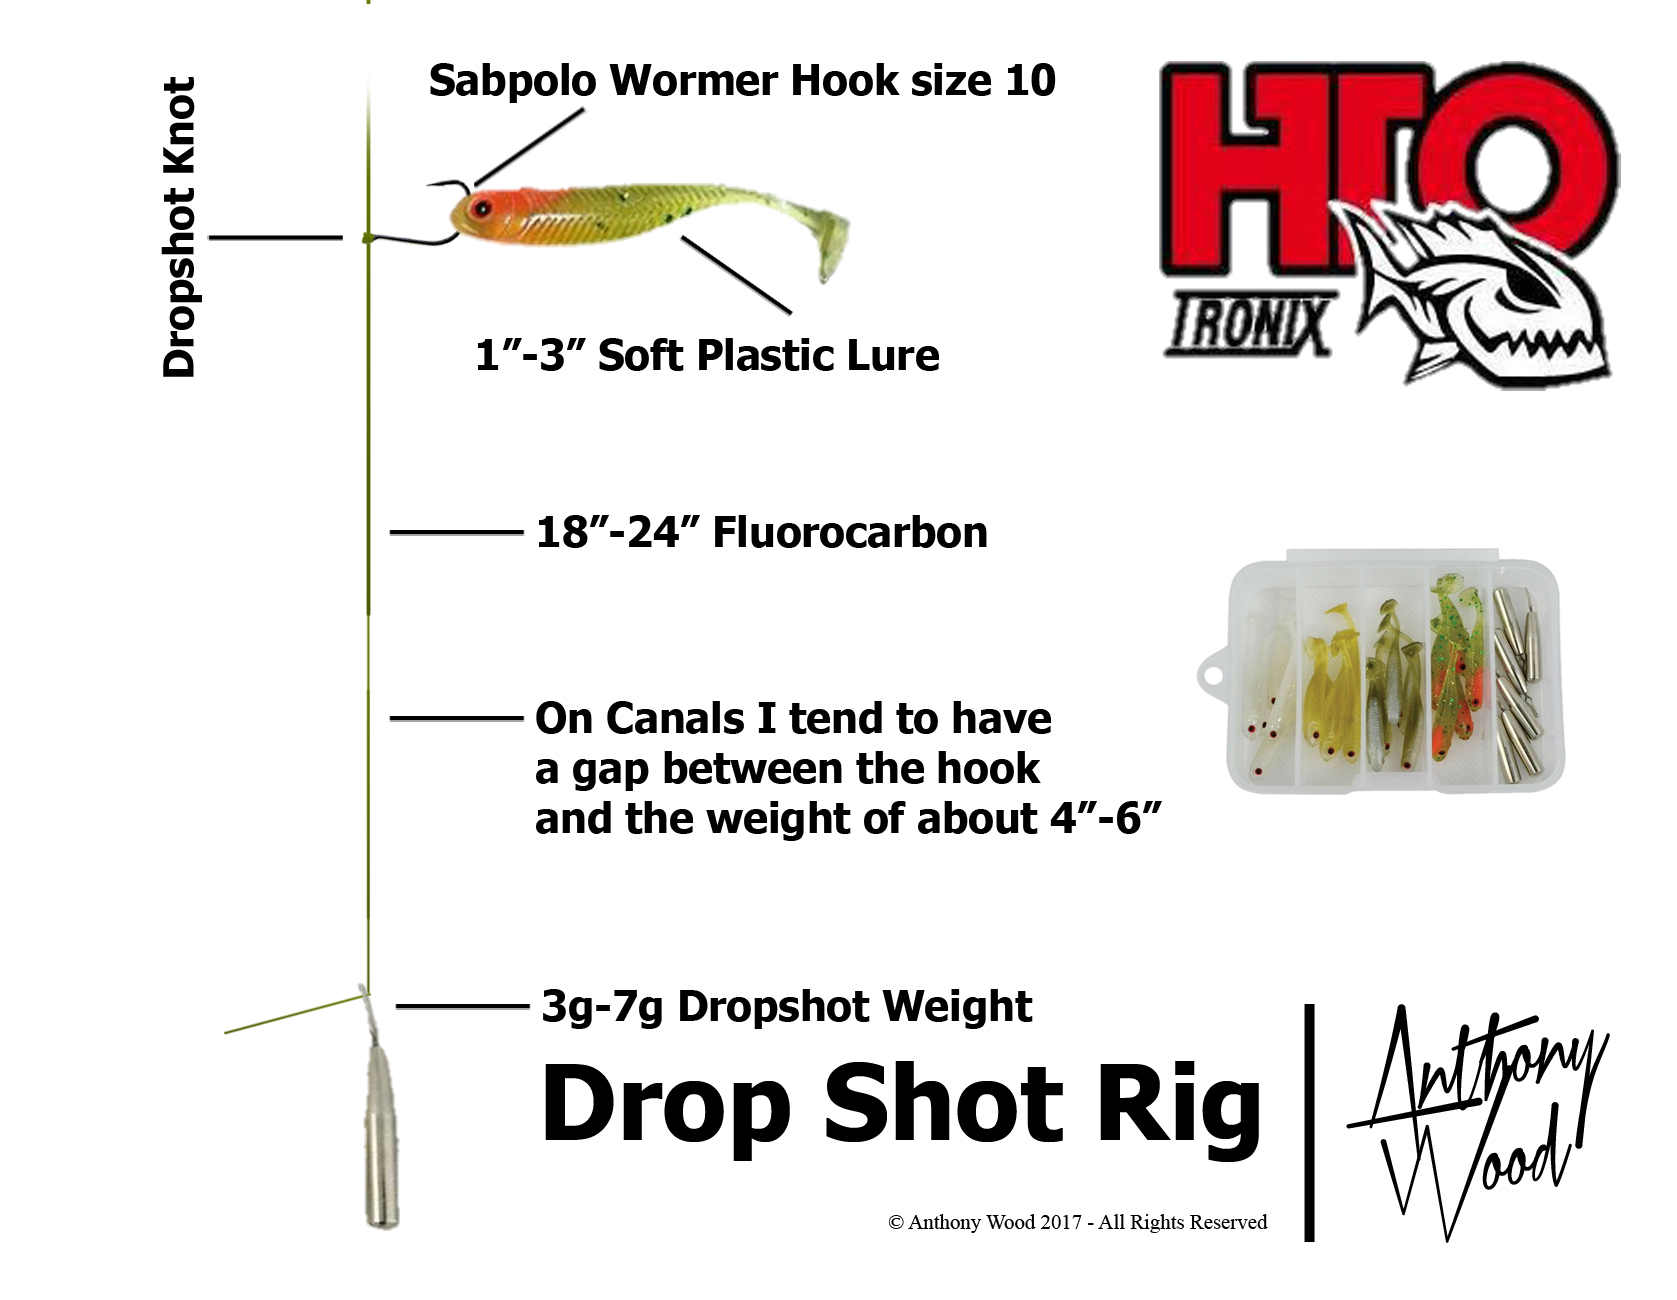
There are lots of combinations of terminal tackle that you can use to make this rig and as you can see from the image there are dedicated kits available that have special lures and weights ready for you to use in convenient small tackle boxes to keep them all together.
We recommend tying the rig onto your braid mainline with a double uni knot. The reason we say to use braid mainline is that you need to feel as many knocks, bumps and takes as possible.
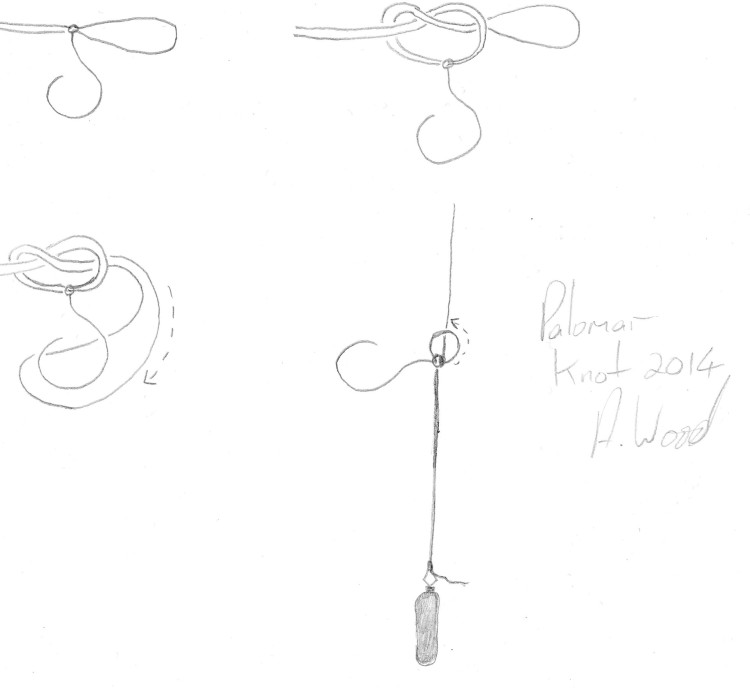 There are a few ways to tie the rig and the first is by using the palomar knot. To tie the palomar knot take around 36″ of fluorocarbon and then double it over, passing the loop through the eye of the hook. (if your struggling, pass the line through the eye before doubling it over and then just thread the line back through the eye creating the loop.)
Fold the loop back against the main line and tie a simple granny knot (overhand knot) using the loop. Make sure the loop is big enough to allow the hook to be passed through it.
Pass the hook through the loop, lubricate the line with saliva and carefully pull the two tag ends, which will tighten the loop down. (make sure the loop goes over the eye of the hook)
Finally take the bottom tag end (you want the hook point at the top) and feed it back through the eye of the hook giving it a gentle tug to tighten it all up.
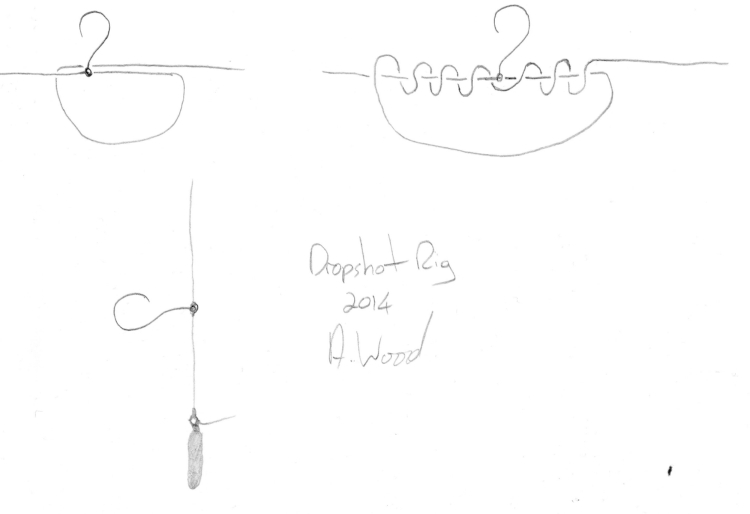 The next knot and the one that is becoming the more popular of the two is the dropshot knot and tying the dropshot knot can be tricky to start with but once you’ve done it a couple of times it becomes really easy to tie. Firstly take a length of fluorocarbon the length of which will depend on the water you are fishing, next slide your chosen hook on to the fluorocarbon so that it points upwards on your rig.
Create a loop in the fluorocarbon so that the bottom of your line goes behind the hook, rotate the hook four times through the loop you have now created. Holding the hook, carefully pull both ends of the line so that it tightens up around the hook.
There are two ways to fish this rig, the first method is vertical dropshotting which is usually done from a boat and literally you put your rod out over the edge, let your rig drop to the bottom and gently lift the tip of your rod so that you feel the tension of the weight on the lake bottom and then lower the tip slightly to relieve the tension on the line, this creates a movement in your lure which any predator fish near find hard to resist. With the vertical lift method it isn’t unusual to have longer tails to your rigs as it is often fished in deeper water and you want your lure higher in the water.
The second method is horizontal dropshotting and is very similar to jigging in the sense that you cast your lure out and then holding your rod tip quite high slowly retrieve your lure giving the rod an occasional twitch to lift the weight off the bottom (instead of your jig) again creating a movement in your lure that predators struggle to leave alone. The big advantage of this method is that you can stop your retrieve at any time if you think you are in an area where there are a few predators, then simply adopt the vertical method of tighten and loosening your line against the weight to create movement in your lure.
There are several other rigs out there at the moment, but these are probably the top three (besides if we wrote about them all this would be one seriously long article lol). If you haven’t seen these rigs before or haven’t tried them yet, give them a go and let us know what you think.